Showing posts with label sewing. Show all posts

Friday, August 28, 2015

Zippy and Zinnia Sewalong -- Thumbhole hack!

These past two weeks I've been leading a sew along in the Blank Slate Patterns Facebook group (head over there if you aren't already part of the group!). We've been making Zippy and Zinnia jackets and today I'd like to share a pattern hack to add thumbholes to the sleeve cuffs. While my post is specifically axed towards these two patterns, the principle is applicable to any shirt or jacket pattern with cuff sleeves.

Adding thumbholes to your cuffs is really a very easy hack, you mostly just need to get the math right. And I'm going to do that for you. The basic idea is that when you sew the short ends of the cuff piece together to form a tube, you don't sew the entire length of that seam, but you leave two openings. These will then align as you fold your cuff to form the thumbhole. All right, enough talk. Let's start with the Zippy jacket. 

The math for the Zippy is easy since the pattern piece is a nice round 5" high. For little hands a 1" opening works well, so I decided to alternate 3 1" seams with 2 1" openings. After folding the cuff, your thumbhole will end up exactly in the middle, with 0.5" on each side. (The pattern has a 0.5" seam allowance so you'll "lose" half and inch on each side after attaching the cuff to the sleeve). 

Drawn out on the pattern piece:


Now we transfer this onto the fabric after folding the cuff piece short ends together (right sides together). Draw the lines to be stitched at 0.5" from the edge of the fabric. I like using a quilting ruler for this:


Now stitch on the lines. Don't forget to backstitch at the start and end of each seam!


After sewing your three 1" seams, press open and then fold the cuff in half on the fold line, right sides out and align the holes. Pin so the don't move around. Now you're going to topstitch around them to keep them nicely in place. If you're making a small size like me, you're probably going to have to put your sewing machine foot inside the cuff: 


Congratulations, you've just made a thumbhole! 


Now because of your topstitching you won't be able to fold open the cuff completely anymore in order to attach the cuff according to the pattern instructions. It can still be done this way, it's just a little more finicky. Place the sleeve inside the cuff, right sides together, Making sure to line up the seams. Now fold back one layer of the cuff as far as you can and attach the cuff to the sleeve. 


Turn the sleeve inside out and fold back the inside layer of the cuff to cover the seam you just made. Then topstitch on the outside of the sleeve following the seam from the previous step and catching both layers of the cuff. Again, this is best done with the needle inside the circle you're sewing, especially for smaller sizes.


 And you're done!


If you're making a women's shirt, I recommend a hole of about 2". These are the measurements I used for my Zinnia:


I hope this was useful! If you've made Zippy and/or Zinnia jackets during the sew along, come show them off in the Facebook group! I'd love to see what you made!

And if you don't have the patterns yet, these a discount until the end of the sew along! You can get either or both pattens for 10% off using the code ZINZIPPY. Valid through August 30, 2015. Go grab your copy here! (Affiliate link)

Now go sew some thumbholes!

:-)
M

Wednesday, March 26, 2014

Classic Oxford Button-Up. I finally made one!

I'm still here!! And I made a fancy shirt!


I know, it's been quiet around here. Life got in the way... But, I'm back and I'm going to be posting at least once a week. Right on.

So, today I want to show you a project I made a little over a month ago, using the Peek-a-Boo Classic Oxford Button-up pattern. Let me tell you, I'm not often scared to start a project, but this one was intimidating me. Especially the sleeve placket. So I cut it out before Christmas... And put it aside. 


Then picked it up again for Kids Clothes Week.... Didn't finish it. And then daycare was having picture day on Valentines day, and I just knew I wanted N to wear this shirt. So I got my act together and just went for it. And it was a lot easier than I thought it would be! Look at that placket!


I had done a collar with collar stand before, but it didn't come out quite as nice as I had hoped. This time I had much better luck (and a much better pattern):


Of course I ended up finishing at 2 am, because the best way to finish a project is on a deadline in the middle of the night. True for sewing projects and science alike. ;-) But I did finish it and it is so nice, I love it.

I'm also kinda in love with the fabric... Which comes from a sheet that I bought at a thrift store!!! The accent fabric was a remnant that I got 50% off at JoAnn's. I'm fairly sure the most expensive part of the shirt is the 12 buttons. And they were actually quite cheap... :-)

 And last but not least... The kiddo loves it too!! And that makes it a winner in my book! I'll be making more of these!!! Actually, I have a couple planned for the summer with short sleeves!


Oh, I almost forgot to mention the button tabs for rolling up those sleeves!

CHEERS HANDSOME!!!

Mama M.

Monday, September 2, 2013

Time flies...

...when you're having fun...

Vacation is over, tomorrow is back to work/daycare... :( We had a great week though!!

Good news: being back home means being back with my sewing machine! And I just really enjoyed Labor Day sale. I got some nice patterns for myself! Yeeeaaaa, selfish sewing coming up!

A little preview, a Rose shirt by Blank Slate Patterns that I made a while back:


Thursday, August 29, 2013

W pants pattern test

I've been debating with myself what would be a good place to start blogging about my sewing. I've got so many projects I'd like to share... So I decided to go with my first pattern test: the W pants pattern by Blank Slate Patterns.

love this pattern, another great one by Melissa. It comes in three length options (shorts, capris and pants) and has lots of options such as a functioning zipper fly and a zippered welt pocket. I think I need to make a pair for every day of the week -no one will be able to tell they're all from the same pattern. (Disclaimer: I don't get anything for saying I love this pattern, I just really do. I did get the pattern for free for testing it.)

I tested the size 18m in capri length. The red fabric is a medium bottom weight that I received around 2m of and that had been waiting in my stash for a great project. The denim is a remnant I got at Joann's; not enough for a complete pair of pants, but just perfect for the details on this one!


For these, I only added one zippered welt pocket. Partly because I had never done it before and didn't want to complicate things more, partly because I only had one red zipper of the right length. Even if it didn't turn out perfect, it was ridiculously easy thanks to Melissa's explanation and next time I'll do two!


Talking about things I'd never done before... Zipper fly. Hello... Have you looked at those? No way I can pull that off! *correction* Way I can do it! Yay! So awesome. I do them all the time now. Even used this tutorial to add a functioning zipper to a pattern of another designer. :-)


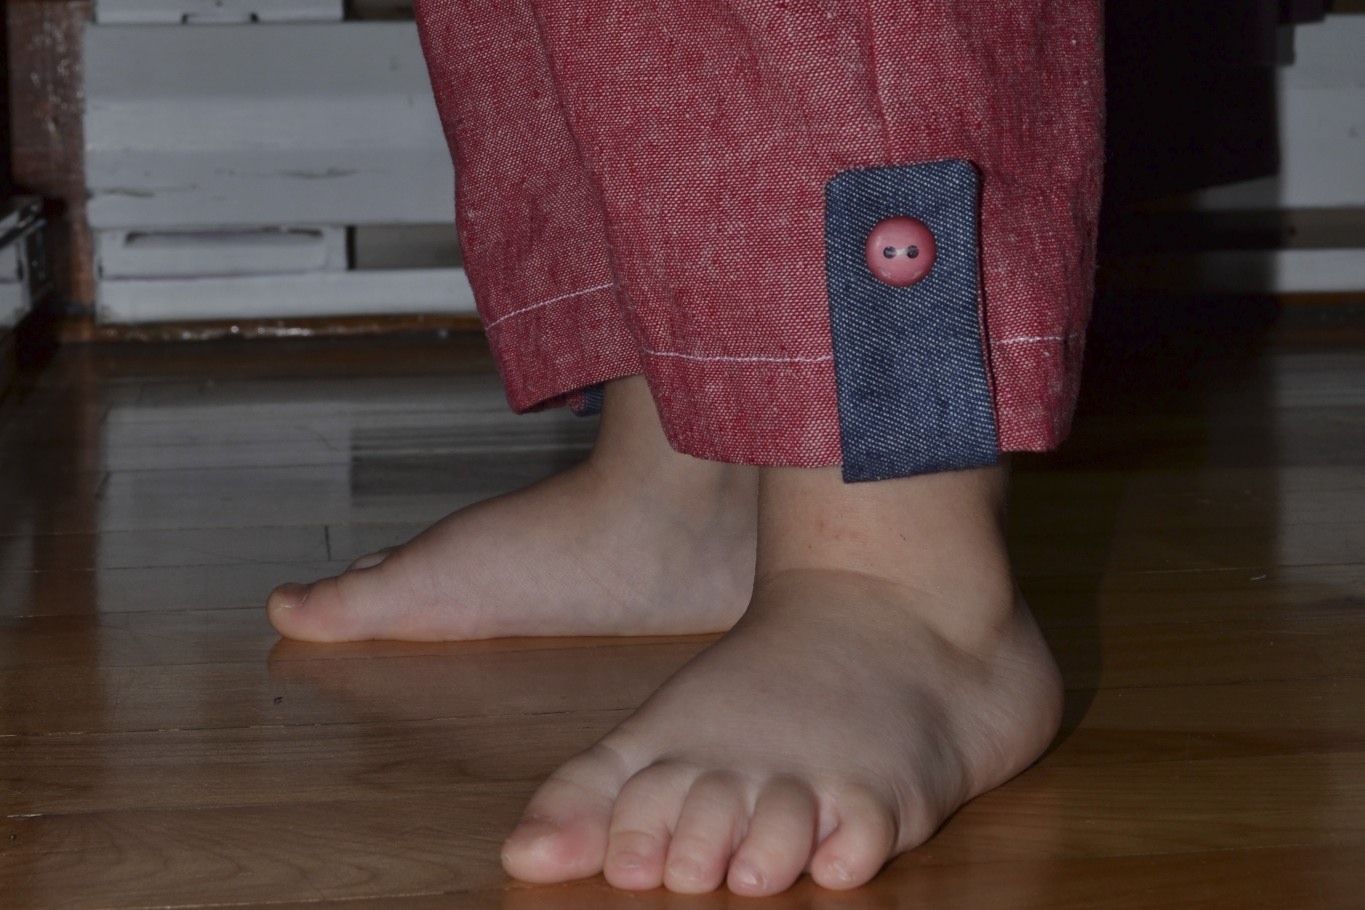
I also added the faux button tabs to the bottom of the legs so I could have my blue accent fabric come back there. I really like how that turned out.


They ended up being a little long, but that has been fixed in the final version of the pattern. 

And the kiddo? He loves them and wears them all the time!


Thanks Melissa, for another great pattern!